|
| |
Ultimate Challenge: The Snap
| Putting a snap back
together is more than an exercise in reassembly of two short bits into one
more agreeable, long one. Original flex characteristics want to be
preserved, and the weight kept as close to the original as possible. All of
this without creating hard spots, which would only lead to further snaps.
And of course, it all needs to look purdy. The
following is my current procedure, evolved from about 90 snap repairs to
date, of which (2) came back. Both of those had snapped again. Both snapped
more than 3ft from my repair.
Instead of introducing stringers and broomsticks and
such, I simply rebuild the structure with materials as close to the original
construction as possible, using long scarph joints everywhere, with long,
staggered overlaps of the reinforcements, in order to create as smooth a
transition as possible from the original lamination to the new. Of course,
all Divinycell gets vacuum-bagged, in order to insure perfect adhesion.
Done this way meticulously, taking great care to fair
every intermediate step, will add 1/2 to 1oz to a shortboard, and up to 2oz
to a longboard. All the feedback I have received confirms that these snap
repairs ride very much like the originals. As a matter of fact, I have a
waiting list of folks anxious to purchase refurbished snaps. |
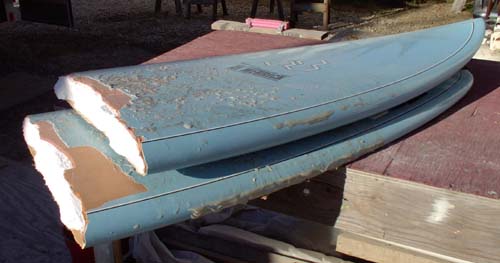 |
a large rider had ignored a major deck
indent for too long, causing the deck to buckle and the board to snap. The
deck had failed in compression, with the EPS core squooshed together at deck
level. The outer fiberglass laminations had peeled a bit, but not
excessively so. The board was otherwise in fine
shape, without any additional structural dings, so that reconstruction was a
very viable choice. |
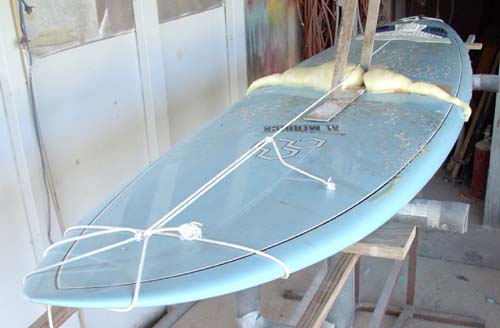 |
Parts reassembled on a rocker jig, with
considerable tension created deck and bottom via these very high-tech
"Spanish Windlass" tensioning devices. This tension will help to perfectly
align the bits, and minimize the amount of fill needed, i.e. keep weight
gain to a minimum. With everything under
tension, I inject rigid Marine Urethane foam, to help hold the bits aligned,
and to seal the structure for future vacuum-bagging. |
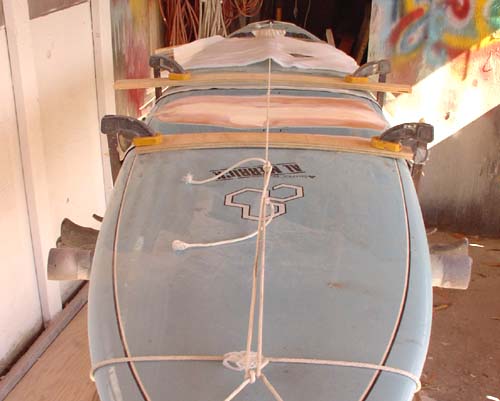 |
Once the Urethane foam has set, I clamp
the board to a jig, and bevel-grind the deck to sound material, removing
everything that has been crushed, delam'd and otherwise compromised in any
way. The EPS core gets filled as needed, to create a smooth sub-strate for
the inner structural laminations. All
tensioning devices stay in place throughout these manipulations, since the
Urethane foam is not of the strongest... |
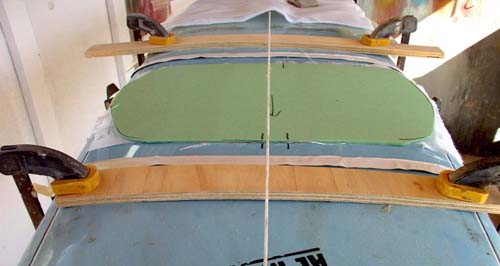 |
Preparations for the vacuum-bagging of
the inner glass and Divinycell (or rather, in this case, Herex cross-linked
PVC), with all ingredients pre-cut, marked, and sorted in the order they
will be needed. |
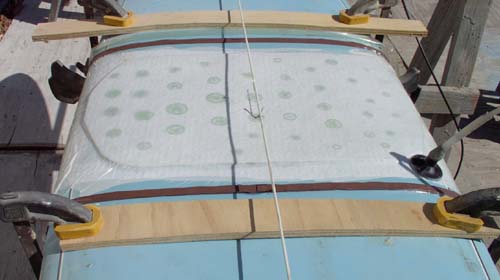 |
Inner glass & and PVC foam in place with
the slowest Epoxy I have (West System 105 resin with 206 hardner). Peel ply
and breather fabric cover the Herex, to evenly distribute the vacuum.
Pressure is about 6inHg. (and immediately after
taking this picture, I flipped the board over, in order to prevent
accelerating the Epoxy cure and creating harmful exothermic heat) |
 |
The bottom is then prepared the same way
as the deck. Tensioning devices still in place, until there are balanced
structural laminations on both deck and bottom. |
 |
Herex and inner glass vacuum-bagged to
bottom, then feathered out. Adjacent paint and primer removed, and the
original laminations bevel-ground, in order to achieve a gradual transition
to the new laminations. |
 |
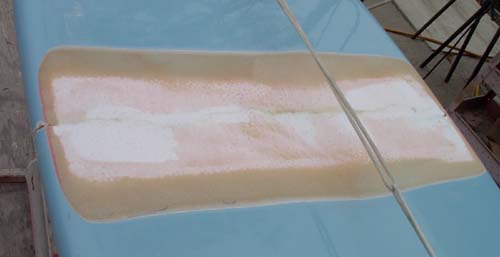
New fiberglass in place deck and bottom.
I overlap each layer on the rails, just like the factory does originally. |
 |
Fiberglass ground, filled with an Epoxy
fairing compound, then sanded smooth. See how little filler is required! |
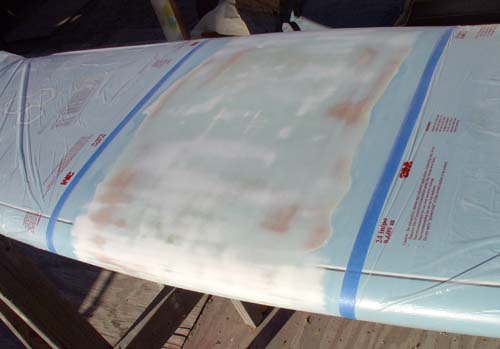 |
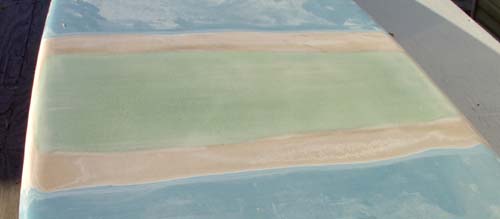
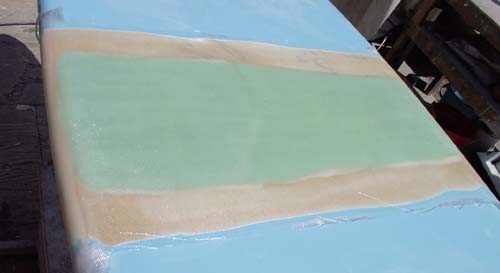
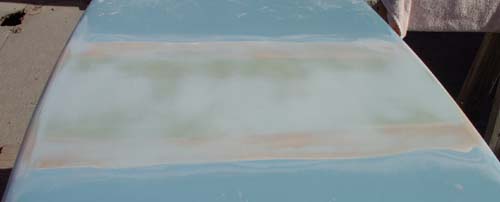
Deck faired, then primed, then most of
both fairing compound and primer sanded off again. At this point, with your
eyes closed, your hand would not find any bumps.
I tape off the rest of the board with pre-taped masking
film. Extravagantly expensive, but a wonderful time saver! |
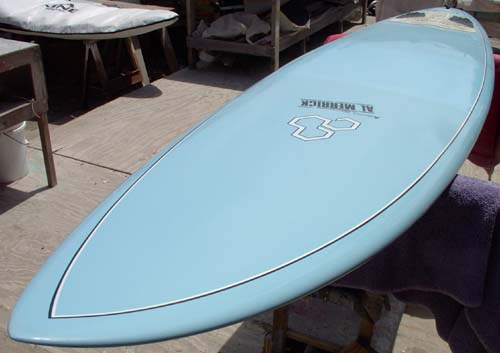 |
LP applied, sanded and polished, then
pinstripes touched up. Not so bad - for a
Kraut... Thanks to Bill S for
providing the model for this pictorial! |
|
a PS: about one year after the above snap repair, this
board just came back to me with a busted FCS insert. It had in the meantime
been to Fiji and to Hawaii, and been surfed regularly in its home waters.
The snap repair is as good as the day it first left here. Serious
shoulder-clapping time! |
|
PPS: another 1 1/2 years later, it just came back with a
mashed nose. Snap repair still good as new, customer happy, I happy - yeah! |
|
back to
Repair Menu |
|